Building a RepRap
- Frame
- Y-axis
- X-axis
- Z-axis
- Controller and wiring
Frame
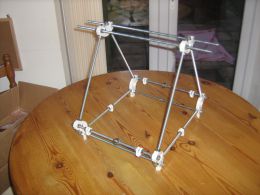
My kit is the RepRapPro version of the Mendel. Their build instructions which I followed can be found here. The first thing to do was to assemble the metal frame using the M8 threaded rods, plastic parts and M8 washers and nuts. Everything is assembled loose because it all needs to be aligned before final tightening.
Y-Axis

Part way though assembling the Y-axis I was worried that it was not running smooth. After wasting a lot of time I decided to continue. I found that once the belt had been fitted and tensioned the Y-axis felt a lot smoother.
X-Axis
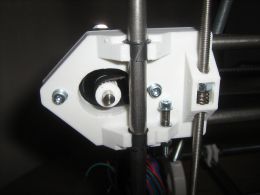
One thing I kept doing wrong during this build was to tighten the screws only to find I had to loosen them again. I didn't realise that the two screws in the end of the x-axis are for adjusting the overall width. Don't crank them really tight like I did. They are not designed to screw all the way in. You also don't need to fit the washers, they serve no purpose because the screws are never screwed fully tight.
Z-Axis
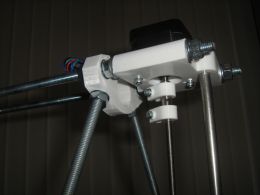
Fairly straight forward. It's important that the vertical smooth rods are square.
Controller and wiring
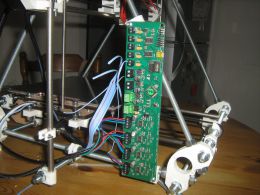
Look carefully how the controller is orientated. I originally fitted my in the wrong place only to find the printer head would hit it. The wiring is straight forward, but I found the offcuts from the motor wires were not long enough to be used for the endstop wires. I used spare wires in the ribbon cable for the endstops. Remember to keep the offcut from the 20Amp cable, as it is needed for the power supply. The 20Amp cable was difficult to solder and get into the PCB terminals. The plastic part that fits to the power supply was a poor fit and was very difficult to screw in, but I got there in the end.