Ping Sensor
- Ultrasonic Range Finder Module
- Standard Servo
- Bracket and Mounting Kit
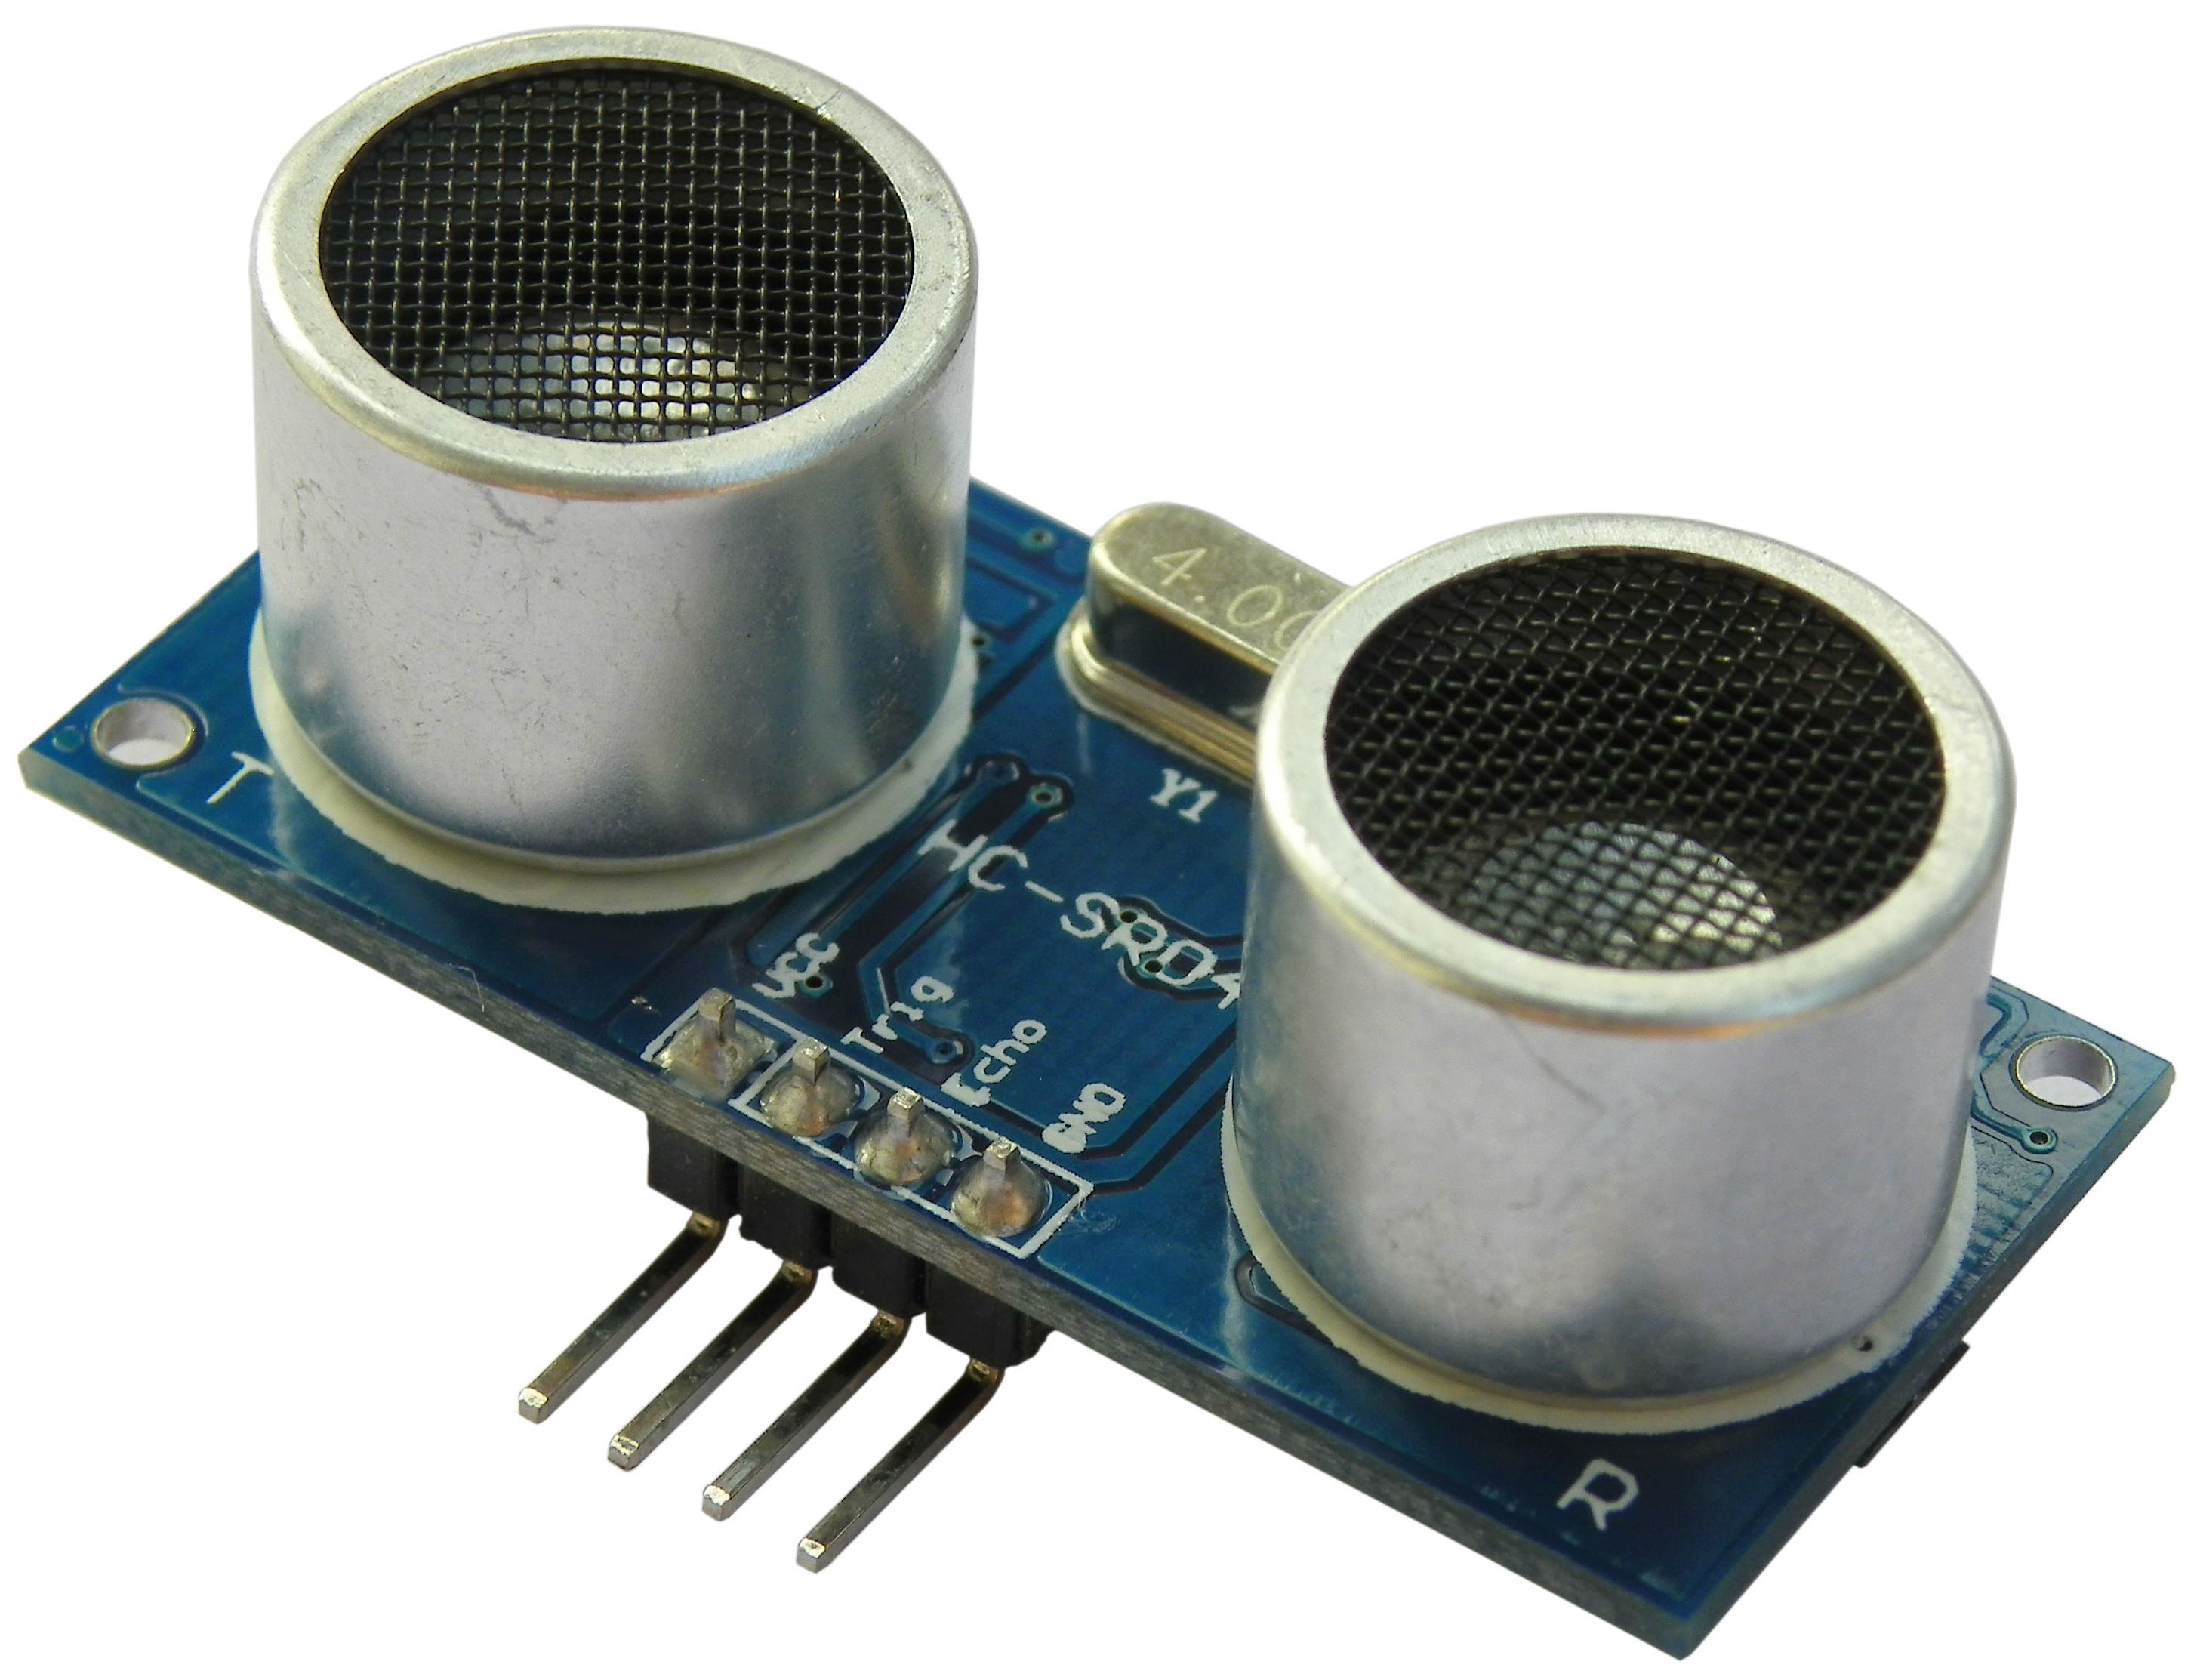
Ultrasonic Range Finder Module
I used a HC-SR04 which is a four wire device. Unfortunatly it does not fit directly to the bracket included in the kit below, but it is a fraction of the cost compared to the Paralax 3-wire device.
Standard servo
This was included in the kit below. I cut the connector off the end and soldered on some jumper wires to enable it to be plugged into the Arduino.
Mounting Bracket Kit
The kit contains everything needed to mount the ultrasonic range finder module to the mobile chassis platform. The platform has a cutout to accept a standard servo which is included in the kit. I used M3 screws and nuts from Farnell to mount the servo. You have to open up the holes in the servo arm, then screw on the metal bracket.
Complete kit available from Active Robots
Note: This kit does not fit the HC-SR04. I had to modify the HC-SR04 circuit board by carefully cutting off the corners.
How it works
The ping sensor works by sending out a short high frequency pulse of sound waves then listens for an echo of the pulse after it bounces off an object and back to the sensor. By measuring the time it takes for pulse to come back, and taking into account the speed of sound, we can calculate the distance between the sensor and the object.
For our sensor we need two control pins, one to signal the sensor to send a pulse (an output pin) and one to get the echo back (an input pin). So in our Arduino sketch we set up the pins like this;
// Pin configuration
int pingPin = 4;
int echoPin = 2;

void setup()
{
    // Configure ultrasonic distance pins.
    pinMode(pingPin, OUTPUT);
    pinMode(echoPin, INPUT);
}
To signal the ping sensor to send a pulse we have to set the ping pin (our output pin) to high for 5 micro seconds and then back to low again. To ensure we get a clean 5 microsecond pulse we set the pin to low before we start.
A pulse is returned on the echo pin. The length of this pulse indicates the time it took for the signal to return. To read a pulse on an input pin we use the Arduino function pulseIn()
.
long getDistance()
{
  long duration;

  // Sending the signal, starting LOW for a clean signal
  digitalWrite(pingPin, LOW);
  delayMicroseconds(2);
  digitalWrite(pingPin, HIGH);
  delayMicroseconds(5);
  digitalWrite(pingPin, LOW);

  // Get echo and calculate distance
  duration = pulseIn(echoPin, HIGH);
  return microsecondsToCentimeters(duration);
}
The last thing to do is to convert this time value into a distance value, taking into accound the speed of sound. This is a simple calculation that we wrap up in a utility function microsecondsToCentimeters(). Show here;
long microsecondsToCentimeters(long microseconds)
{
  // speed of sound = 340 m/s or 29 microseconds per centimeter.
  return microseconds / 29 / 2;
}
The reason we divide by 2 is that the sound pulse has to travel to the object and back again. Half the the time is spent traveling to the object and the other half returning to the sensor. So the distance is travelled twice. And that's it. To use it we simple call our getDistance() function that will return a long variable containing a value that represents the distance in centimeters.
long distance;

distance = getDistance();
You can find the complete Arduino code for the robot here.